
Storage/Portable Ubuntu Studio Workstation
- Kris Fedick
- Mar 19, 2025
- 9 min read

Updated: Jul 20, 2025
A while ago I posted a review on a portable SSD enclosure that I had intended to use for a storage/portable Ubuntu Studio workstation (https://www.geekpantsmedia.com/post/tech-review-asus-rog-strix-arion). In this post, I discuss how I installed Ubuntu Studio on the drive and got the portable storage working.
There are a few methods that I have seen online. These methods take what is considered a safe approach by either removing the systems internal drive first or using the bios to disable the drive. The reason for doing this is to protect your system drive from accidentally being overwritten or having the bootloader for their primary OS (usually Windows) from being overwritten by the Ubuntu one. However, it is possible to install Ubuntu Studio safely without removing the internal drive or disabling it (I have not tried it with other versions of Ubuntu or any other Linux OS). In this post, I will go through all the steps I took to perform the installation.
In this post, I assume you, the reader, already know how to create a Ubuntu bootable USB key and boot from a CD/USB key. This is a pretty simple process. There are programs (like Rufus) which will do this for you in Windows and, if you are using Ubuntu already, you can create a bootable USB key (or CD if you like optical drives) in Ubuntu so I leave it up to the reader to select their preferred method. I also assume the reader knows a bit about partitioning drives or is at least familiar with the concept. It is easily possible to loose your data or even render the drive you are partitioning inoperable during partitioning if it is done wrong so if you are uncomfortable or unfamiliar with partitioning, you should learn about it before you try to follow this method. In the following method, I will go through each step of the process I followed. Even simple steps, such as selecting a keyboard layout, are included.
Disclaimer:
While installing Ubuntu, or any other OS as a dual boot, it is possible to break your bootloader or loose the data on your computer. This information is offered without any warranties or guarantees and you acknowledge that, by following any of the information in this post, you are accepting responsibility for any damage or loss (software, data, hardware, or otherwise) that may occur and that I, Geekpants Media, and anyone associated with Geekpants Media are not responsible for any loss or damage (software, data, hardware, or otherwise) that may occur from following the information on this post.
Step 1: Read the Damn Disclaimer
Go back and read the disclaimer if you haven’t. This project involves creating and editing partitions on an external drive and installing Ubuntu on the drive as if it is the main drive of the computer. If you do this incorrectly, it could erase your main system disk or mess up the bootloader of your system. Follow these instructions at your own risk.
Step 2: Create a Bootable USB Stick
You will need a USB stick with enough space for Ubuntu Studio to be installed. 8Gb and up will work. You will also need an external hard drive to install Ubuntu on. The first step is to create a bootable USB key with Ubuntu Studio on it. There are several ways to create one. I used Rufus.
Step 3: Boot from the USB Stick
Reboot the computer and use the USB key to boot into Ubuntu. Each manufacturer has a different way to do this. Usually it requires turning off the computer then turning it back on (instead of using the "restart computer" option). When the computer is first turned on, for a second or two, there is a pause where the screen back light is on but nothing is happening. If a function key is pressed at this time, in my case f9, it will interrupt the boot order and allow you to change what device you boot from (searching for how to change the boot order for your computer should get you the method for it). Select the USB key and boot into Ubuntu.
Step 4: Plug in the External Drive and Connect to the Internet
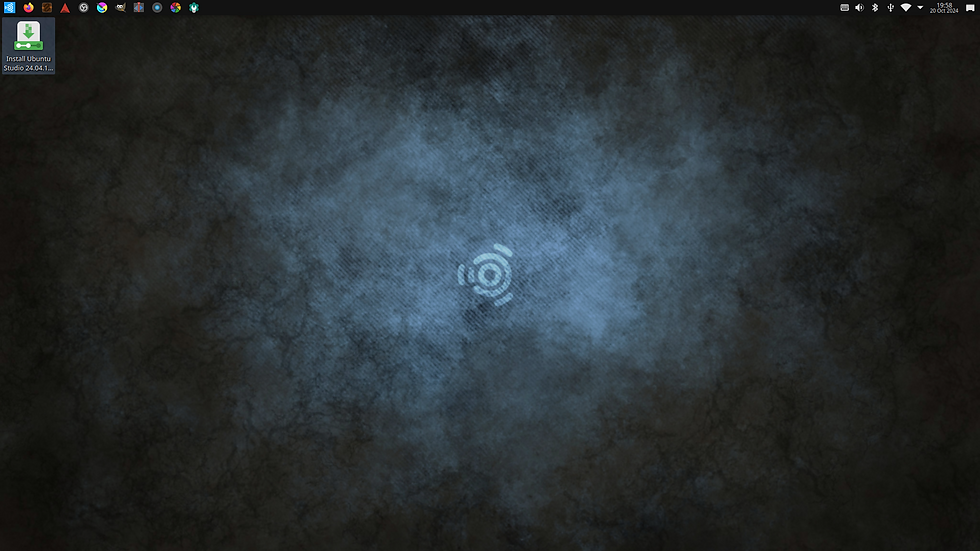
You should now be in the Desktop of Ubuntu (see example below). Plug in the external drive you want to install Ubuntu on and also connect to the internet (if your USB installer didn’t have the option to store these credentials when you created the bootable USB). This can be done by using the icons in the upper right corner of the screen. Next double click on the “Install Ubuntu...” icon.
Step 5: Select your Ubuntu System Language
Select your language of choice.

Step 6: Select your Ubuntu Keyboard Layout
Select your keyboard layout.

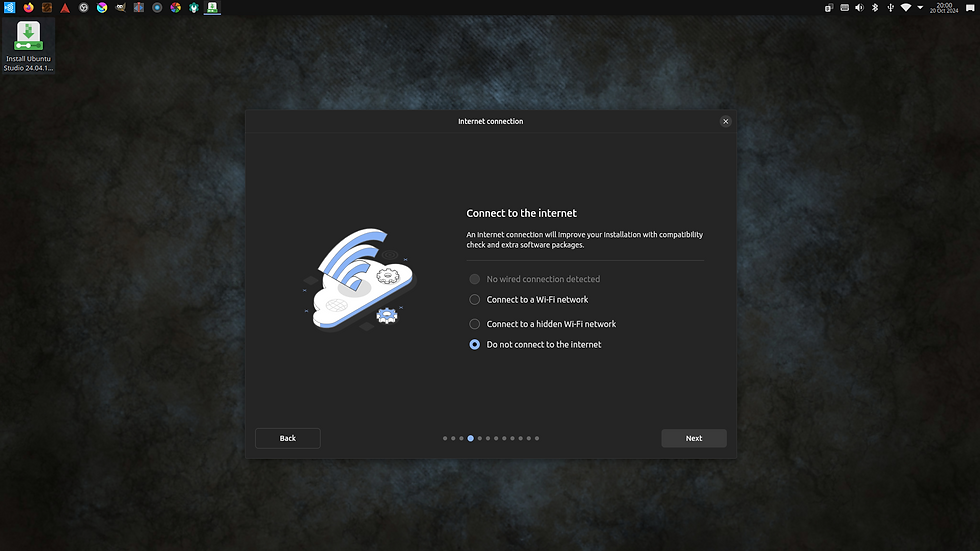
Step 7: Connect to the Internet
The reason I said to connect to the internet at the Desktop is because some of the times I performed this install the menu shown below didn’t actually work for connecting to my network. If you haven’t connected, you can try connecting using this menu. If you already are connected, select “Do not connect to the internet” and click “Next”. If you decide to try connecting to your network at this menu and it doesn’t work, close the application (“x” at the top right of the window) and connect at the Desktop before re-opening the “Install Ubuntu” program. If that fails, reset the computer and connect to your network using the desktop before starting the “Install Ubuntu” program. You can continue without an internet connection but that would require you to update your system and install some useful software after the OS installation.
Step 8: Select Installation Type
Select “Interactive Installation” and continue. This will allow you to create partitions on your external drive that are important to the installation and also to set the boot device as the external drive (which is extremely important).

Step 9: Install Proprietary Software
Next you are asked if you want to install proprietary software that aren’t allowed to be included with the Ubuntu software bundle. If you have connected to the internet, I recommend selecting both of these options because they are extremely useful. If you don’t have an internet connection you can install them later after the install. If you don’t want the software, you also don’t have to select either box before moving to the next step.

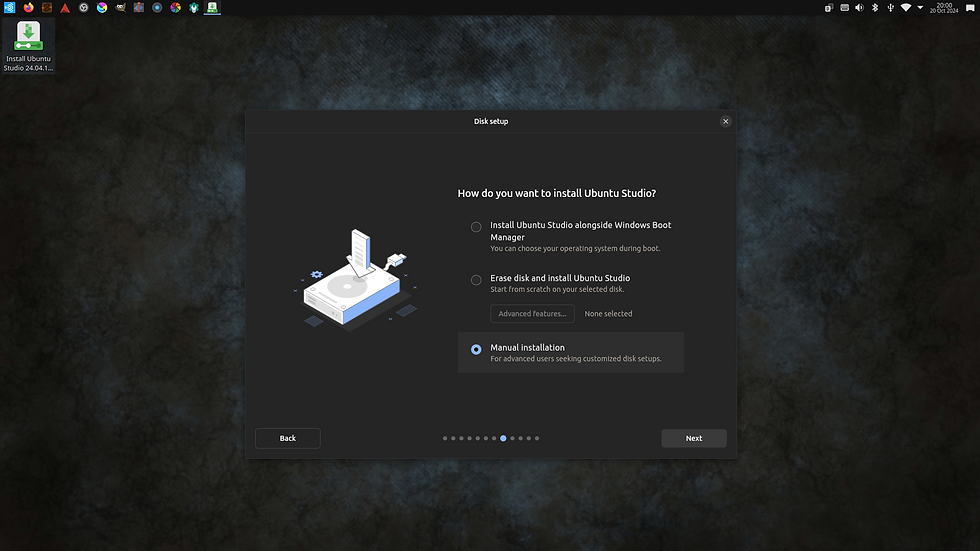
Step 10: Select Manual Installation
This is where the dangerous stuff happens. The first option is great if you have a second internal HDD or SSD to install Ubuntu on. This will allow you to install Ubuntu as a dual boot with Windows and boot into either system whenever you want to use either one. Some people have partitioned a single internal drive and installed Ubuntu on that (including me) but that can lead to some issues with Windows (I actually had a Windows update delete the partition with Ubuntu on it. Luckily I knew how to fix it!) so I would say it’s best to install Ubuntu on a separate internal drive with option 1. Option 2 is only good if you want to erase everything and start with a fresh system. Installing onto an external drive for booting into Ubuntu doesn’t fit under either of these so select Option 3: Manual Installation
Step 11: Set up the Ubuntu and Storage Partitions
This will give you the option to partition and set up your Ubuntu drive. One drive will be your USB drive. In my case, it was the 123 GB hard drive. Another drive will be the windows drive. It will have the Windows Boot Manager on it. DO NOT DO ANYTHING WITH THIS DRIVE!!! The other drive will be your external drive (and probably have only one partition listed). In my case it is "sdb".
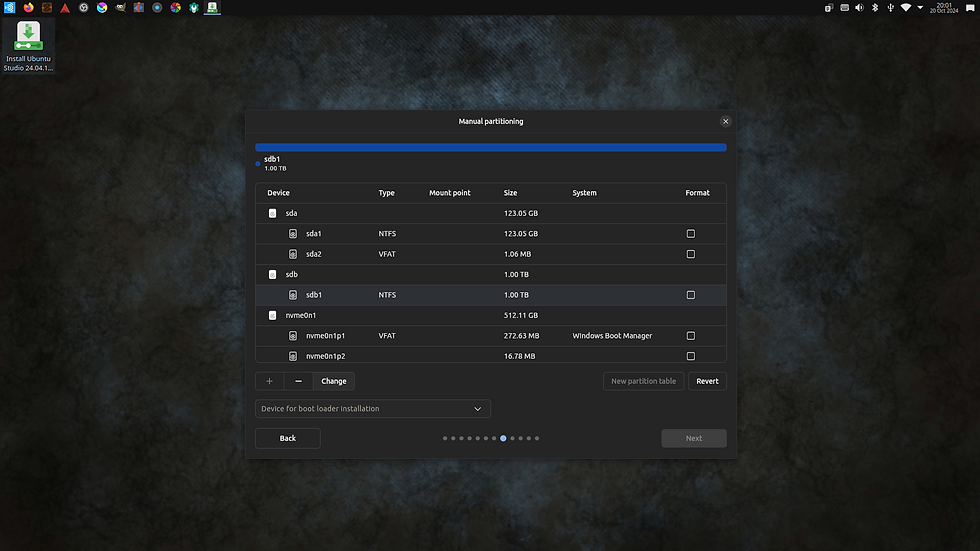
Select the external drive. Then click “Change”. This will bring up the “Edit Partition” dialogue shown below.

What you do next depends on if you want to have a shared storage drive or not. I created a storage partition that was half the drive in size. If you select NTFS or exFAT for the partition, it can be read by both Windows and Ubuntu/Linux which is very useful for sharing files because Windows won’t be able to see the Ubuntu/Linux partition. In my case, it was already NTFS so I left it like that and selected half the size of the drive so there would be plenty of space to work with. The mount point can be left blank for this as well. If you don’t want to have a shareable storage then don’t set this partition and scroll down to the next paragraph.

If you created the partition, you will be left with the partitioning window shown above. If you did, select “Free space” and click the “+” symbol to bring up the “Create window” dialogue again. If you did not assign extra space, you will still be in the “Create partition” window and will only have one partition to select.
Now we will create the swap partition. This partition is similar to a Windows page file. For Ubuntu, the minimum should be equal to the amount of ram your system has and, at most, twice the size of the RAM. I have 8 GB of space on this system but, since it is a travel OS and I may end up plugging it into a system with 16 GB of RAM, I selected 32GB (twice 16GB). After selecting the size, set “Use as” to “Swap” and click “Ok”.

This will bring you back to the “Manual partitioning” menu. You will see your created partitions under the external drives entry. Select “Free space” and then click the “+” symbol.

The next partition will hold your Ubuntu system files. It’s necessary for both the operating system to be installed as well as the bootloader. Set the size, I used what was left since I won’t be using any more partitions. The minimum requirement for Ubuntu is 15GB but this partition will, by default, be where your downloaded programs are stored so you should make it larger.

I would say at least 150-200 GB should be a good size for local file storage and programs. Set the “Used as:” to “Ext4” and the “Mount point:” to “/” and select “Ok”. This will bring back the “Manual partitioning” screen shown below.

All of the partitions you created should be listed under the external drive (in my case "sdb"). You should see an extra FAT32 partition with “/boot/efi” as the mount point. This should automatically be generated when you create the “/” partition. If it isn’t there, you need to create it as well. You can remove space from the “/” partition using the “-” symbol to create the space. 1.2GB should be a good size for this partition. Before continuing, select the “Device for boot loader installation” drop down menu and select your external drive from the list. If it is not on the list, something went wrong with the partition assignment and you will have to start over by using the “Revert” button. Likewise, if you accidentally edited a drive you didn't intend to change, use the "Revert" button to cancel the changes and start over. If you are able to select the external derive as your boot loader drive, select it and click “Next”.
Step 12: Create Your Account
This brings up the “Create your account” screen. Basically, create a local account.

Step 13: Select a Time Zone
Select a time zone and click “Next”

Step 14: Review and Confirm Your Settings
Review your choices. Make sure the installation disk is set to your external drive (mine was ESD-S1C ROG sdb). DO NOT CLICK “INSTALL” IF YOUR INSTALLATION DISK IS NOT set to your external drive. If your external disk is set as the installation disk, select “Install” to install Ubuntu.

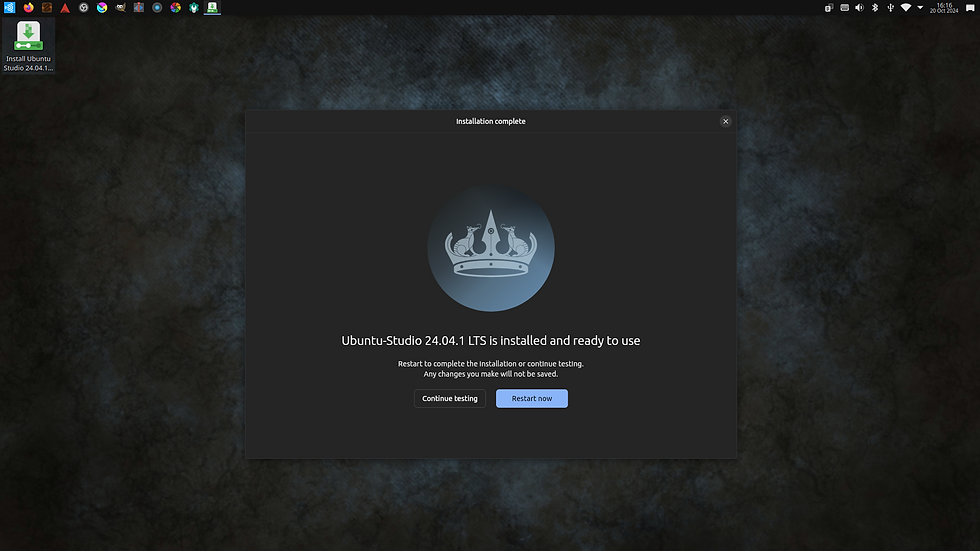
Step 15: Installation Complete!
Installation complete. If you did not create a shared storage partition, you can click “Restart now” to restart the computer. Follow the instructions on screen (sometimes it asks you to remove the USB and press a key while it turns off). If you did create a shared storage partition, you should test and, if necessary, repair it before restarting so select “Continue testing” instead.
Step 16: Verify the Storage Partition is Working
Open the file manager (called Dolphin on Ubuntu Studio). There should be two removable drives with the total space equaling the original external drive space. One will contain system files as shown in the image below. The other should be empty. If it gives an error when you try to open it, as shown in the image below, it will need to be repaired.

Step 17: Repair Storage Partition (If Needed) A
Select the “Start” menu in the upper left corner of the screen, type “part” in the search area (you should be able to just type the characters after clicking on the “Start” icon), and select “KDE Partition Manager”.

Step 18: Repair Storage Partition (If Needed) B
Select the external disk from the list. It will be the one with the Linux file systems on it (see image below). Select the partition with the “NTFS” or “exFAT” file system that you created (mine was NTFS) and click “Delete partition”.

Step 19: Repair Storage Partition (If Needed) C
Select the deleted partition, it will have a large size and be called “unallocated” with an “unknown” file system (see image below). Click “New”

Step 20: Repair Storage Partition (If Needed) D
Select a new file system. Use “NTFS” or “exFAT” if you want Windows systems to be able to use it as well. Give it a name, I called mine “Storage”. Then select “Ok”

Step 21: Repair Storage Partition (If Needed) E
The partition manager should now show a “New Partition” with your selected file system. In my case, I used “NTFS” (see image below). Select “Apply” to apply the changes (nothing will happen or change if you do not select “apply”. If you made a mistake, you can click “Undo” to cancel the changes.)

You should get the screen below. Select "Apply Pending Operations".

Step 23: Repair Storage Partition (If Needed) G
You should get a screen like the one below. Click “Ok” and close KDE Partition Manager.

Step 24: Test the Repaired Storage Partition
Re-open Dolphin and look for the external drive. You should see a drive with the label you provided when you created the partition. In my case it was “Storage” as shown below.

If your shared storage partition works, you can restart the computer. If it does not, you will have to go back into KDE Partition Manager to fix it.


Comments